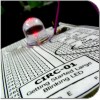
CIRC
01
.:Getting Started:.
.:Blinking LED:.
(ARDX) .:Arduino Experimentation Kit:. (ARDX)
What We're Doing
LEDs (light emitting diodes) are used in all sorts of clever things, which is why we have included them in this kit. We will start off with something very simple, turning one on and off, repeatedly, producing a pleasant blinking effect. To get started, grab the parts listed below, Optionally, pin the layout sheet to your breadboard, then plug everything in. Once the circuit is assembled you'll need to upload the program. To do this plug the Arduino board into your USB port. Then select the proper board in Tools > Board > (your Arduino board), and port in Tools > Serial Port > (the comm port of your Arduino). Next upload the program by going to File > Upload to I/O Board (ctrl+U). Finally, bask in the glory and possibility that controlling lights offers.
If you are having trouble uploading, a full trouble shooting guide can be found here: http://ardx.org/TRBL
If you have having trouble identifying the parts, have a look at the Electronics Primer page, which is also available from the (WCRS) menu to the left.
The Circuit
The Parts
| CIRC-01 Breadboard Sheet x1 |
2 Pin Header x4 |
10mm LED x1 |
Wire | ||||
| 560 Ohm Resistor Green-Blue-Black-Black x1 |
|||||||
Schematic
Resources
.:download:.
Breadboard layout sheet
http://ardx.org/BBLS01
Fritzing diagram
https://wcrsyyc.github.io/ardx/fritzing/CIRC01.fzz
.:view:.
assembly video
http://ardx.org/VIDE01
Code (no need to type everything in just)
Download the Code from (
https://wcrsyyc.github.io/ardx/code/CIRC01-code.txt )
(and then copy the text and paste it into an empty Arduino Sketch)
An alternate version can be opened from the Arduino IDE
File > Examples > 1.Basic > Blink
(example from the great arduino.cc site, check it out for other ideas)
/*
  *Blink
  *Turns an LED on for one second, then off for one second, repeatedly.
  *The circuit:
  * LED connected from digital pin 13 to ground.
  * Note: On most Arduino boards, there is already an LED on the board
  * connected to pin 13, so you don't need any extra components for this example.

  *Created 1 June 2005
  *By David Cuartielles
  *http://arduino.cc/en/Tutorial/Blink
  *based on an original by H. Barragan for the Wiring i/o board
*/

int ledPin = 13;     // LED connected to digital pin 13

// The setup() method runs once, when the sketch starts

void setup()
{
  // initialize the digital pin as an output:
  pinMode(ledPin, OUTPUT);
}

// the loop() method runs over and over again,
// as long as the Arduino has power

void loop()
{
  digitalWrite(ledPin, HIGH);   // set the LED on
  delay(1000);                  // wait for a second
  digitalWrite(ledPin, LOW);    // set the LED off
  delay(1000);                  // wait for a second
}
Not Working? (3 things to try)
LED Not Lighting Up?
LEDs will only work in one direction. Try taking it out and twisting it 180 degrees.
(no need to worry, installing it backwards does no permanent harm).
Program Not Uploading
This happens sometimes, the most likely cause is a confused serial port, you can change this in tools>serial port>
Still No Success?
A broken circuit is no fun, send us an e-mail and we will get back to you as soon as we can.
Making it Better?
Changing the pin:
The LED is connected to pin 13 but we can use any of the Arduino's pins. To change it take the wire plugged into pin 13 and move it to a pin of your choice (from 0-13) (you can also use analog 0-5 analog 0 is 14...)
Then in the code change the line:
int ledPin = 13; -> int ledPin = newpin;
Fill in your own number for "newpin".
Then upload the sketch: (ctrl-u)
Change the Blink Time:
Unhappy with one second on, one second off?
In the code change the lines:
      digitalWrite(ledPin, HIGH);
      delay(time on); //(seconds * 1000)
      digitalWrite(ledPin, LOW);
      delay(time off); //(seconds * 1000
Fill in your own numbers for "time on" and "time off".
Control the Brightness:
Along with digital (on/off) control the Arduino can control some pins in an analog (brightness) fashion. (more details on this in later circuits). To play around with it.
Change the LED to pin 9: (also change the wire)
int ledPin = 13; -> int ledPin = 9;
Replace the code inside the { }'s of loop() with this:
analogWrite(ledPin, new number);
(new number) = any number between 0 and 255. 0 = off, 255 = on, in between = different brightness
Fading:
We will use another included example program. To open, go to.
File > Examples > Analog > Fading
Then upload to your board and watch as the LED fades in and then out.